
A promotional banner rail is a rail or rail section that contains an image that the user can click or tap to perform an action (for example, go to a particular content, channel, deep link, or URL).
You can specify a different target for each hardware platform to take account of the fact that different platforms use different formats for such links.
To add a promotional banner to an existing layout, in Rails Builder:
1. Add the rail/section
To add the rail/section:
-
Click on the template that contains the layout in the left pane.
-
Click on the layout that you want to add the promotional banner rail to.
Note: you can also add a promotional banner rails section to a rail that includes other types of sections (for example, content sections or recommendation sections). -
Add a new rail:
-
If the layout is empty, click Create Rail.
-
If the layout already contains rails, click Add New Rail in the right pane.
-
-
Click

-
Give your rail a name and a title and click Create Rail >.
2. Add content to the rail
To add the promotional banner content to the rail:
-
In the newly-created rail, click Add Content.
-
For each rail section that you want to add (do this only once if you want the rail to consist of a single section):
-
At the top, hover over Custom and then click Key Value Pair Section.
-
Click
-
Optionally, in Name, type a name for the section.
-
In Number of items, enter a number. The promotional banner will be displayed at the width of this number of regular rail items.
For example, to make the banner image ten times as wide as a regular rail item, enter 10 here. -
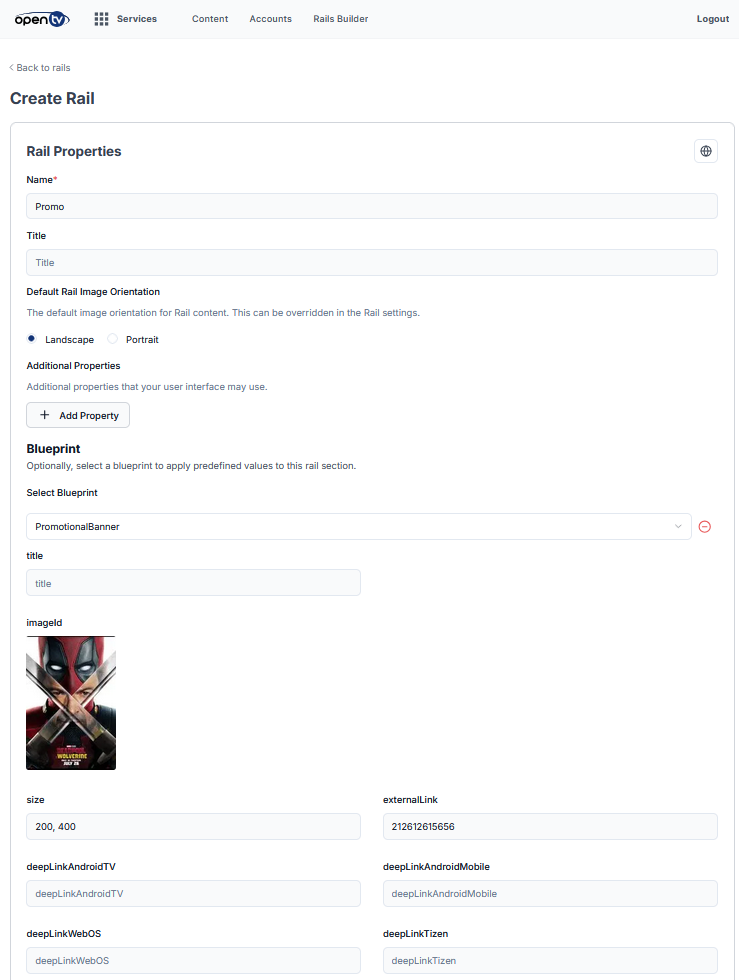
Under Blueprint, select PromotionalBanner from the drop-down.
-
Optionally, in Title, type a title for the banner.
-
Under imageId, click the image to select an image. Either:
-
Select an existing image.
-
Click Upload Image, then click or drag to select an image to upload, then click Upload.
-
-
Click Select.
-
Fill in the remaining fields as follows. Note that all of these are optional (for example, if you do not have an app for a particular platform, you do not need to define a link for that platform).
-
In Size, type the size for the image. This is passed to the client as-is, so the format must be agreed with the client app integrator.
-
Either:
-
Specify one of the following in externalLink:
-
A regular web URI – if the user clicks on the banner, the client app will either open the link in a web view or in a browser.
-
The ID of a content, a channel, or an event – if the user clicks on the banner, the client app will typically navigate to the appropriate media card.
-
-
Specify the deep links for the platforms you support in the following fields:
-
deepLinkAndroidTV
-
deepLinkAndroidMobile
-
deepLinkWebOS
-
deepLinkTizen
-
deepLinkWeb
-
deepLinkOther
-
-
-
In campaignCode, type a campaign identifier. You can use this to track the performance of the promotion in TV Analytics.
-
In localizedPromotionalText, type the localised promotional text to be used for the banner. This must be valid JSON in the format:
JSON[{"<locale>":"<text>"}, ...]For example:
JSON[ {"en": "Hello World"}, {"es": "Hola Mundo"}, {"fr": "Bonjour le monde"}, {"de": "Hallo Welt"}, {"it": "Ciao Mondo"}, {"pt": "Olá Mundo"}] -
In uiLayout, specify the layout that the client should use to display the banner. There are no predefined values – the values used must be agreed with the client app developer.
-
Leave region blank – it is reserved for future use.
-
-
Click

-
Once you have added all the required sections to the rail, click Save Unsaved Changes.
-
Click Back to Rails to see your new rail.
-
ION-specific notes
ION expects the following fields to be populated with the appropriate values:
-
imageId
-
localizedPromotionalText
-
campaignCode
-
One or more platform-specific deepLinks or an externalLink
-
uiLayout – one of the following:
-
These contain a single banner item:
-
promotion_strip_small -
promotion_strip_large -
promotion_strip_15x2 -
promotion_strip_single -
promotion_strip_single_medium -
promotion_strip_single_big
-
-
These contain two banner items:
-
promotion_strip_double_9x2 -
promotion_strip_double -
promotion_strip_double_big
-
-
Note that Number of items (above) must be set to the number of items that the specified uiLayout can contain.