Overview
This page explains how to add a new strip/rail to an existing page (template) and to add content to it.
A separate scenario explains how to rearrange rails on a page. See Rearrange the layout of the home screen.
You can target a strip (rail) to specific device types. To do this, in the rail, click Edit > Segment Target and select the segment(s) for the device type(s).
See 3. Target a template to a device group in Create the page hierarchy for details of how to set up a device type segment.
1. Add a new strip to a page
To add a new strip:
-
From the Operator Console (OpCon) home page, click Rails Builder.
-
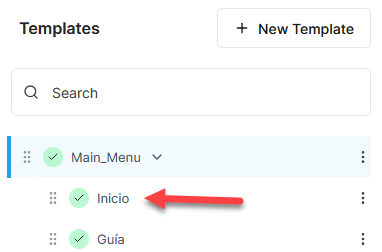
In Templates on the left side of the screen, click on the page that you want to add a new strip to:
-
In the right pane, click on the layout.
-
In the left pane, click the option for the type of strip you want to add:
-
Add Standard Strip – single-height strips where every content item is the same size and aspect ratio
-
Add Magazine Strip – double-height strips where content items have a variety of sizes and aspect ratios
-
Add Promotional Strip – strips of either single or double height intended for promoting/highlighting one or more contents. They can also be used for things like ads.
Note: The left pane includes other options for different types of strips/rails, but they are outside the scope of this scenario.
-
-
In the strip selection dialog that appears, click on the strip type that best suits what you are trying to achieve.
For example, if you selected Add Magazine Strip, you could select Hero Magazine 2: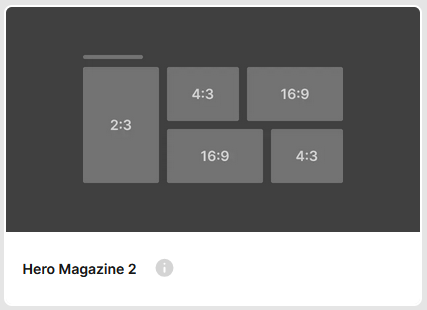
-
In Rail Name, type the name of the rail. For example, “Popular Movies” or “Películas populares”.
Note: this is displayed as the title of the rail if you do not specify anything in Rail Title. -
In Rail Title, select each locale in turn in the locale drop-down and type the title for that locale.
For example: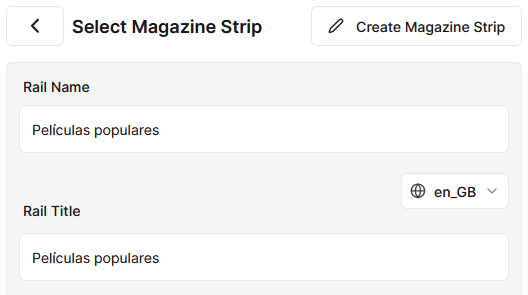
Note: if the locale you need is not displayed, add it in System Configuration – see Metadata languages. After you add the locale, you will need to restart this procedure to see it in the locales list.
-
Click Apply. The new empty strip is added at the bottom of the screen.
-
If you use ION as your client application and you want the strip/rail to be taller than a standard rail/strip, you must also set an explicit height on it. To do this:
-
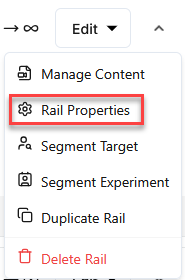
In the strip/rail, click Edit and then Rail Properties:
-
Click Edit:

-
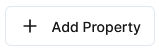
In Additional Properties, click Add Property:
-
In Key, type
height. -
In Value, type the height of the strip in pixels. 540 is the correct height for double-height magazine strip:
-
Click Save and then click Save Rail to confirm.
-
Note that a rail with no height specified has a height of 270 pixels.
So for dual height and triple height strips, you would set height as follows:
-
Dual height:
height= 540 -
Triple height:
height= 810
These are the pixel heights that are used at a reference screen size of 1920 x 1080. A different scaling factor is applied in each of the different ION applications as appropriate to the screen size.
2. Add content to the strip
To add content to the new strip:
-
In the new strip, click Add Content. This opens a screen where you can add content to the strip.
There are a number of options available. These are listed in detail in Add content to a rail. -
Here, we will follow the simplest case – adding VOD content to the strip. If the Content screen is not already displayed, click Catalogue > Content.
-
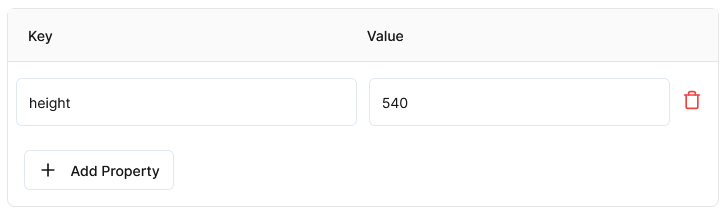
Type in the search box to search for the content that you want to add or look for it in the list. You can use both search and filtering at the same time.
You can filter the list by:-
Showing – select Series, Season, or Editorial Content to narrow down the list to only the selected type of content.
-
Visibility – you will usually only want to add content that is Visible or Scheduled.
For example:
-
-
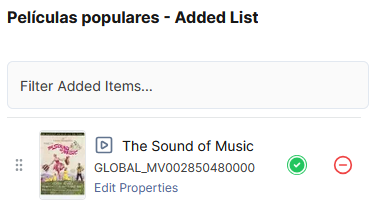
Once you have found content that you want to add, click


This adds it to the rail contents pane on the right:
-
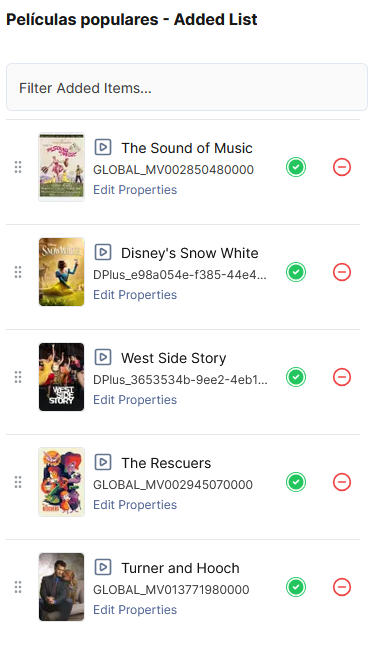
Repeat steps 3 and 4 to add more content:
-
Click Save Changes and then Continue to confirm.
-
Click < Back to Rails.
The strip should now look like this:
Result
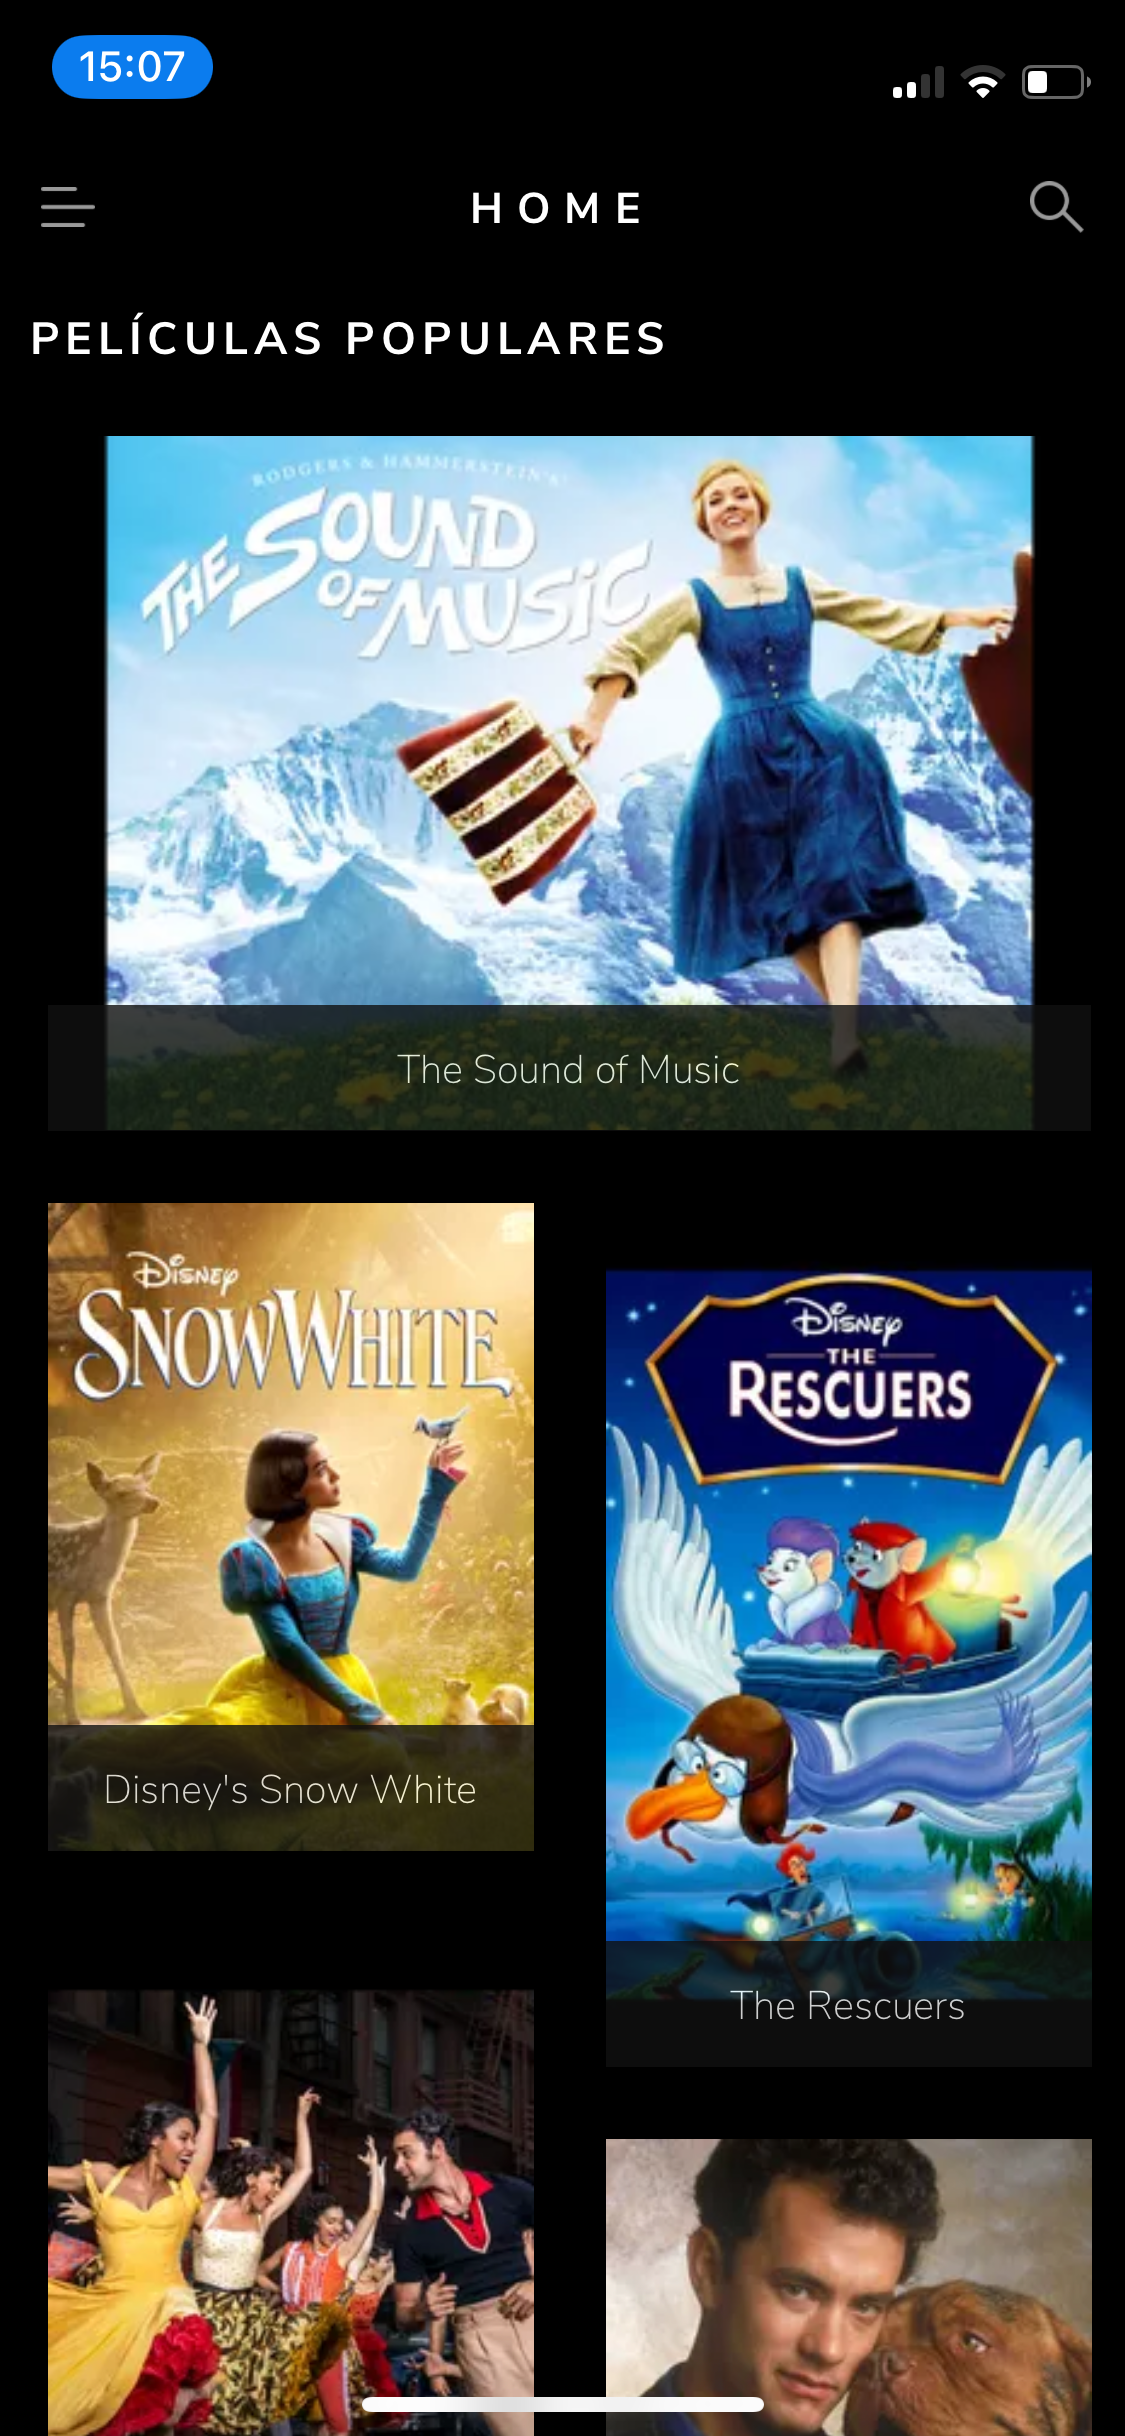
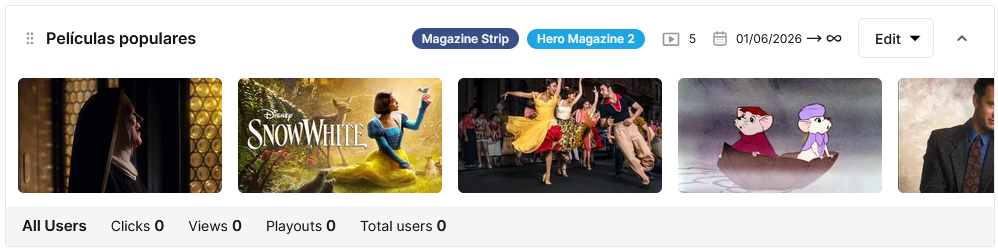
If you use ION, the page that you added the strip to will display it like this: