
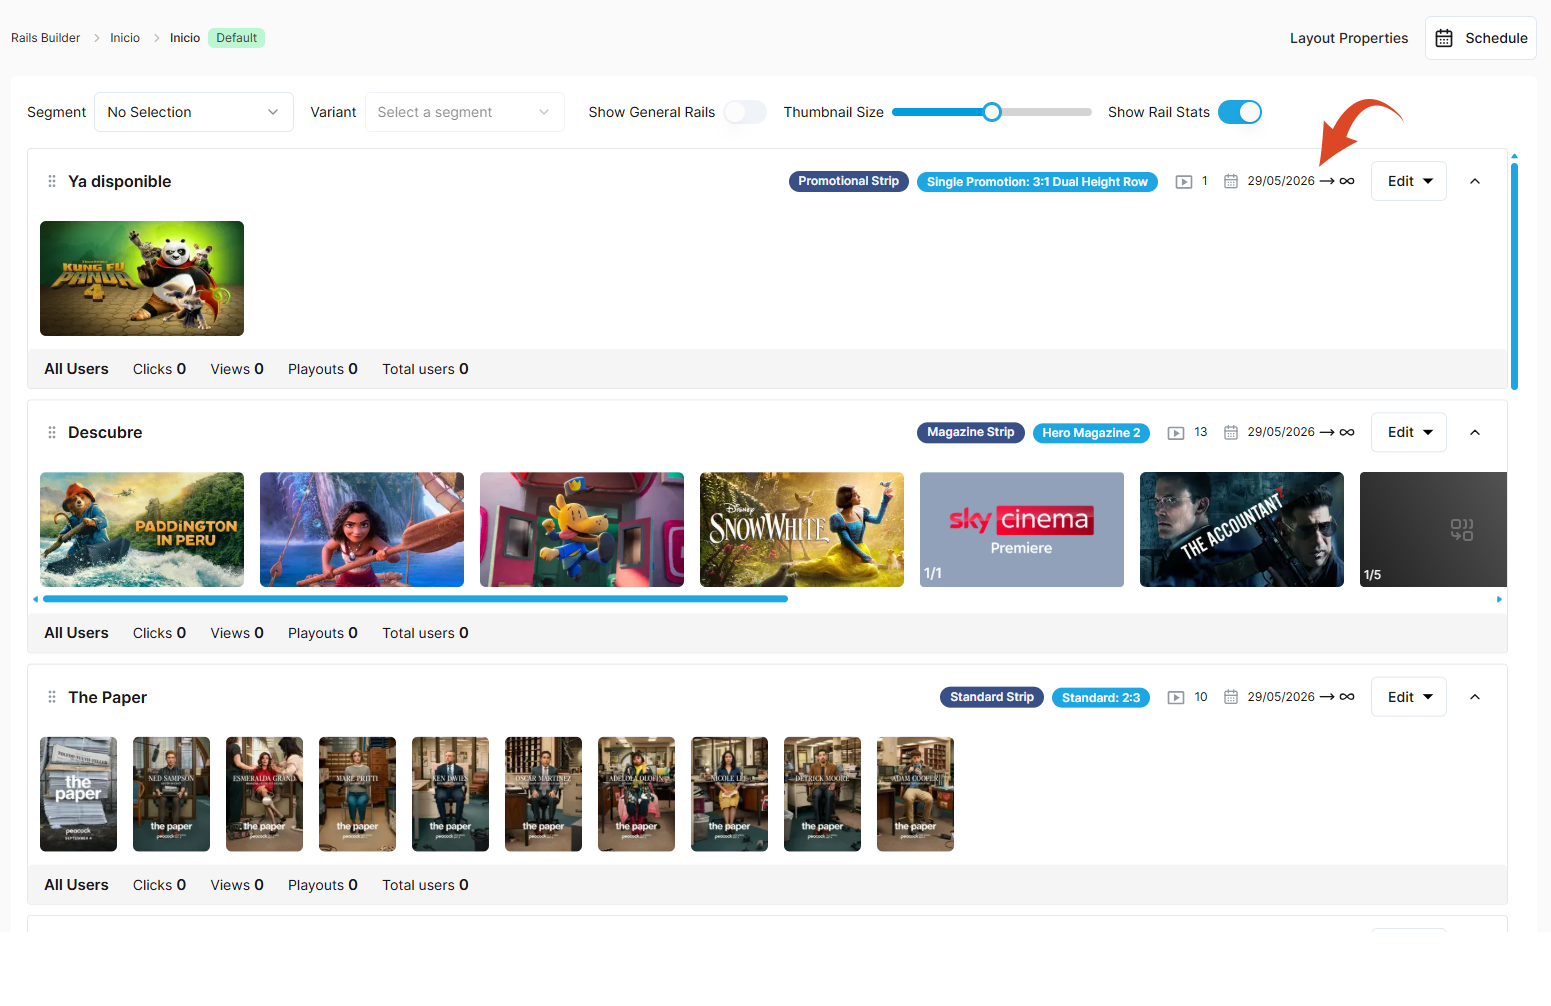
When you create a rail, the visibility date range is set to a default of <current date> to infinity.
Schedule the visibility of a rail
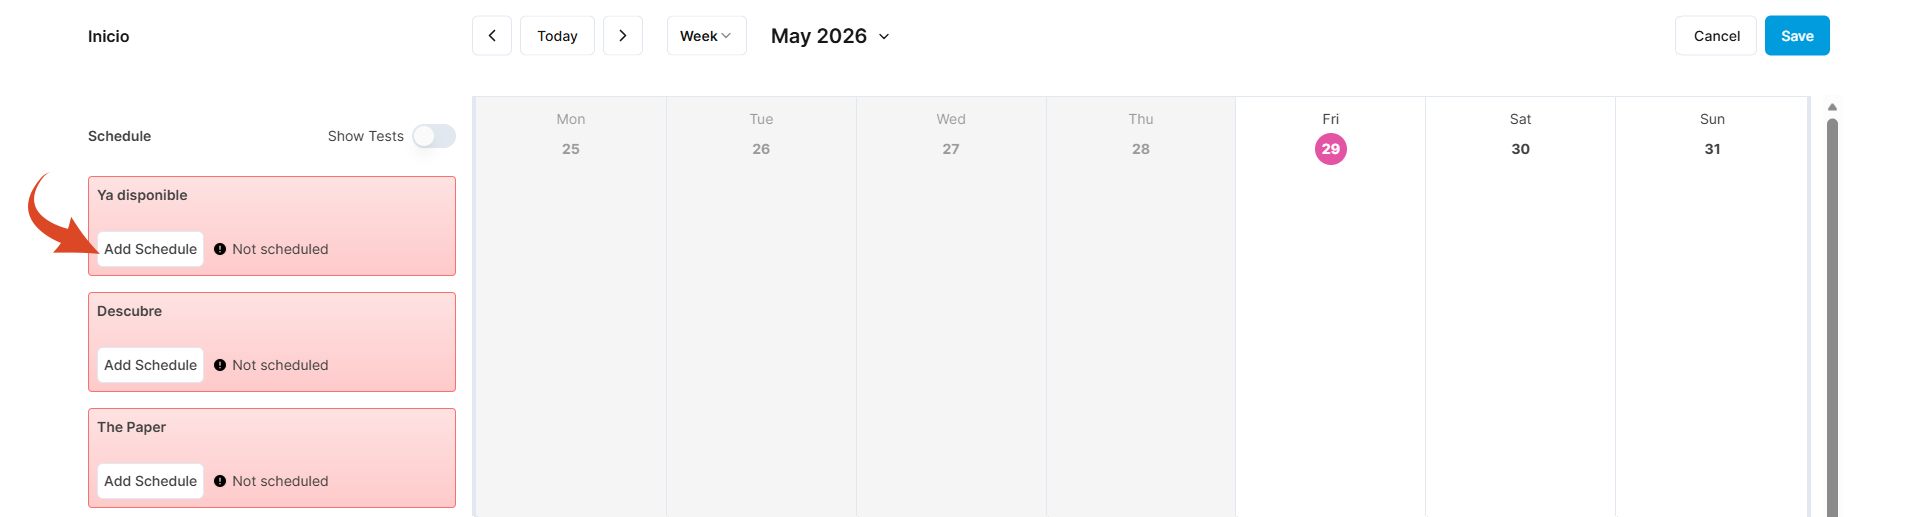
To update the scheduled visibility date range for a rail:
-
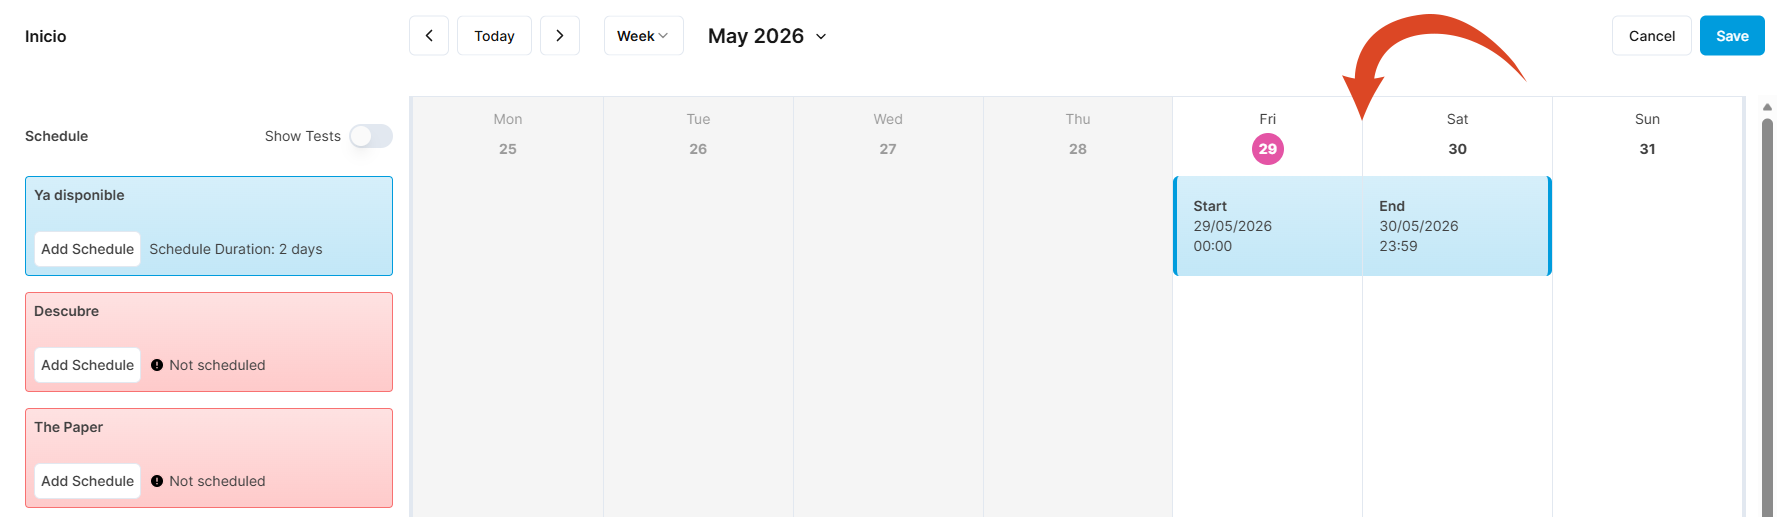
Click the Schedule button at the top left of the layout to display the schedule calendar. The rails are listed on the left.
-
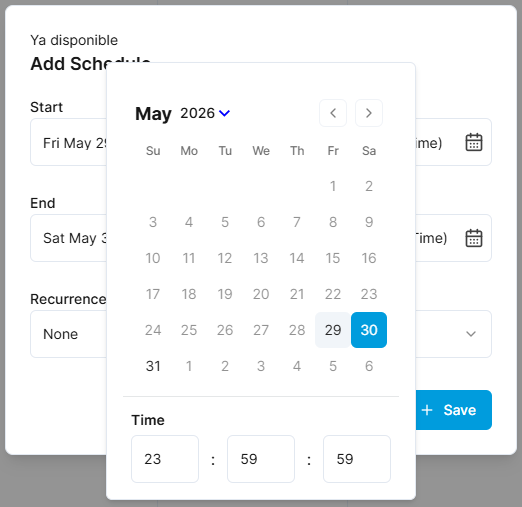
Click the Add Schedule button on the rail that you want to schedule.
-
Select a start date from the date picker.
-
Select an end date from the date picker.
-
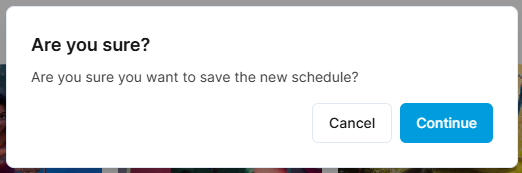
Click Save.
-
Click Continue to confirm the schedule changes.
-
The scheduled period is highlighted in the schedule calendar.
-
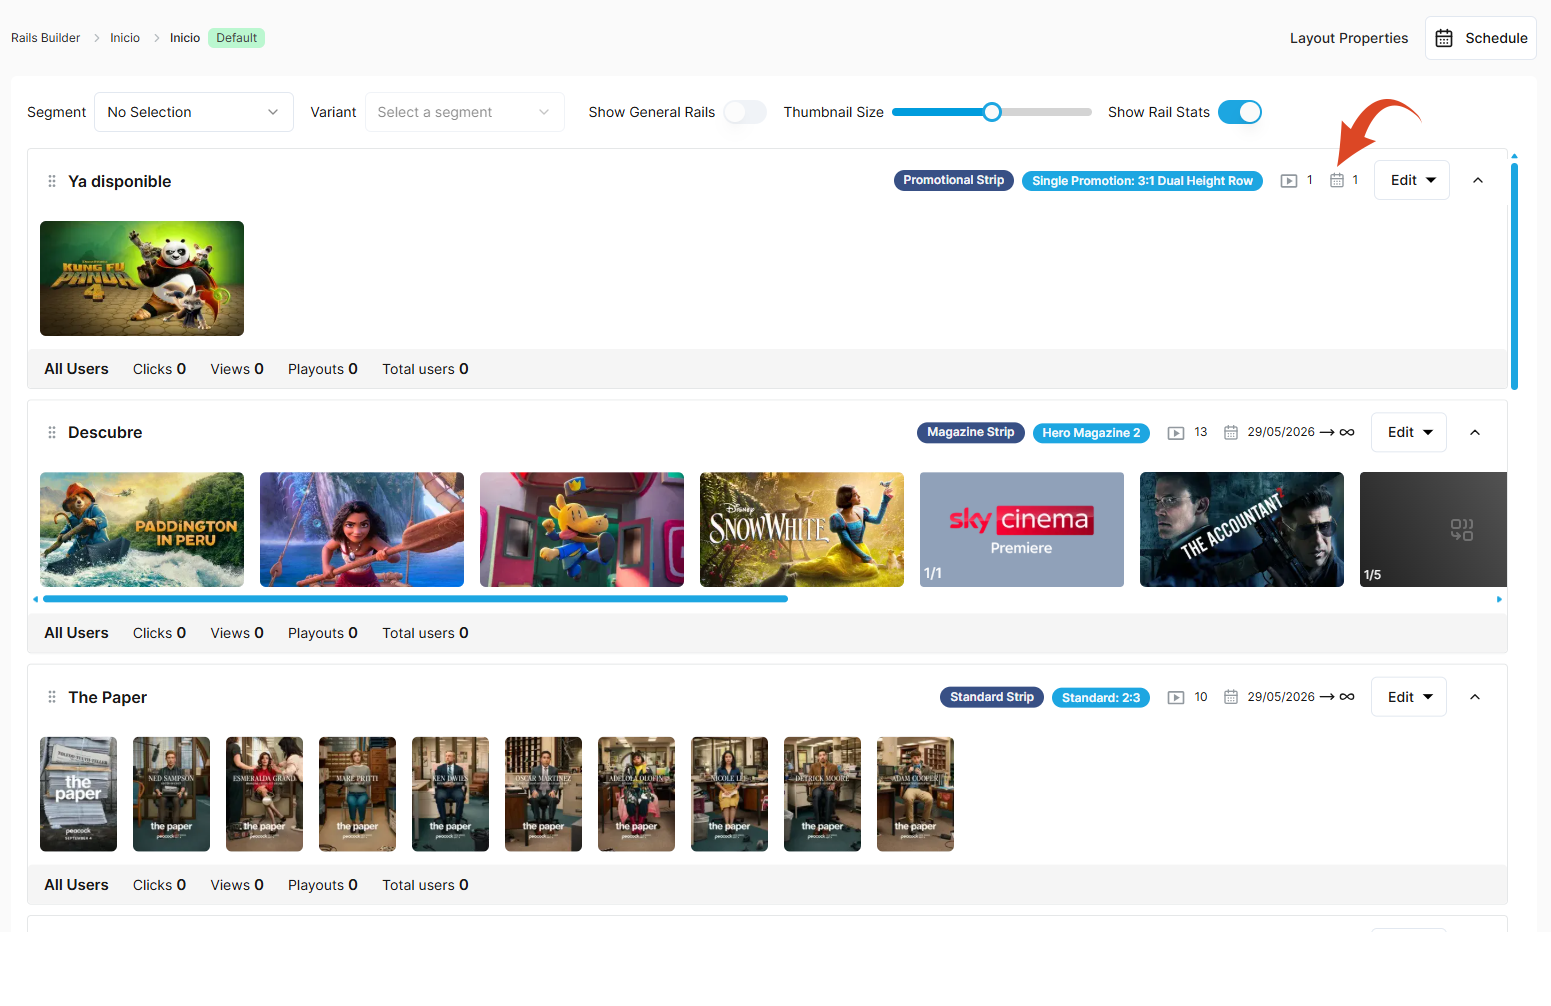
The rail now displays a calendar icon indicating that it has an active schedule.
Edit an existing scheduled date range for a rail
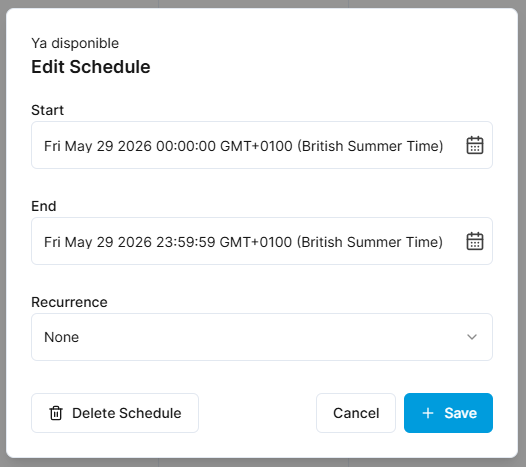
To edit an existing schedule date range for a rail:
-
Click the Schedule button on the layout to open the schedule calendar.
-
Click on the scheduled period (in blue) in the calendar timeline.
-
Edit the dates as required.