
Overview
This page explains how to add a strip/rail and populate it with applications (for example, Netflix, Disney+, Amazon Prime, and so on).
A separate scenario explains how to rearrange rails on a page. See Rearrange the layout of the home screen.
You can target a strip (rail) to specific device types. To do this, in the rail, click Edit > Segment Target and select the segment(s) for the device type(s).
See 3. Target a template to a device group in Create the page hierarchy for details of how to set up a device type segment.
1. Add a new strip/rail to a page
To add a new strip/rail:
-
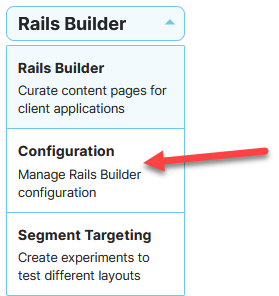
From the Operator Console (OpCon) home page, click Rails Builder.
-
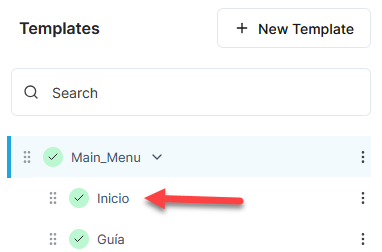
In Templates on the left side of the screen, click on the page that you want to add a new strip to:
-
In the right pane, click on the layout.
-
In the left pane, click Add Standard Strip. A single-height strip where every item is the same size and aspect ratio is the best option for a strip containing applications.
-
In Select Standard Strip, click on the strip type that works best with the images available for the application you want to add.
For example, if the application images have a 16:9 aspect ratio, select Standard 16:9: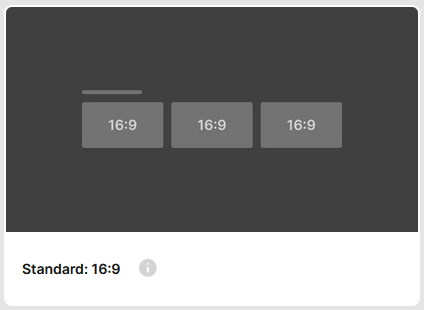
-
In Rail Name, type the name of the rail. For example, “Applications” or “Aplicaciones”.
Note: this is displayed as the title of the rail if you do not specify anything in Rail Title. -
In Rail Title, select each locale in turn in the locale drop-down and type the title for that locale.
For example: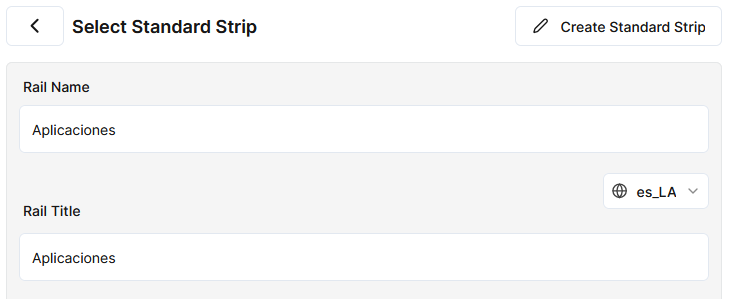
Note: if the locale you need is not displayed, add it in System Configuration – see Metadata languages. After you add the locale, you will need to restart this procedure to see it in the locales list.
-
Click Apply. The new empty standard strip is added at the bottom of the screen.
-
If you use ION as your client application and you want the strip/rail to be taller than a standard rail/strip, you must also set an explicit height on it. To do this:
-
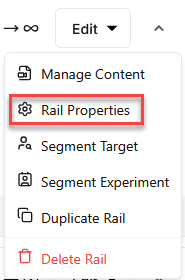
In the strip/rail, click Edit and then Rail Properties:
-
Click Edit:

-
In Additional Properties, click Add Property:
-
In Key, type
height. -
In Value, type the height of the strip in pixels:
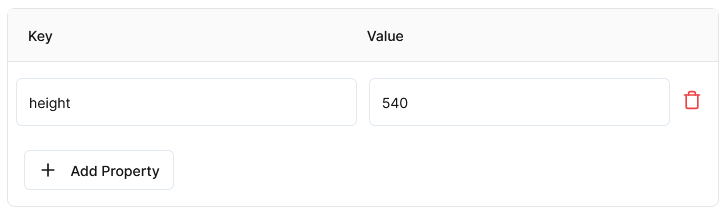
-
Click Save and then click Save Rail to confirm.
-
Note that a rail with no height specified has a height of 270 pixels.
So for dual height and triple height strips, you would set height as follows:
-
Dual height:
height= 540 -
Triple height:
height= 810
These are the pixel heights that are used at a reference screen size of 1920 x 1080. A different scaling factor is applied in each of the different ION applications as appropriate to the screen size.
2. Add applications to the strip
There are two ways to add an application:
-
Application – an application that is not (or may not be) installed on the device
-
Pre-Installed Application – an application that is pre-installed on the device
Only use this option for devices where you have control over the applications that are installed (for example, set-top-boxes).
This procedure uses Application. However, the procedure for Pre-Installed Application is broadly similar.
To add applications to the new strip:
-
In the new strip, click Add Content. This opens a screen where you can add content to the strip.
-
Click Custom and then Application.
-
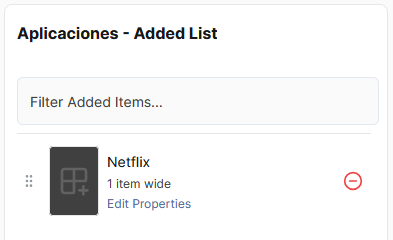
For the application that you want to add, click Add To List:

This adds it to the rail contents pane on the right:
-
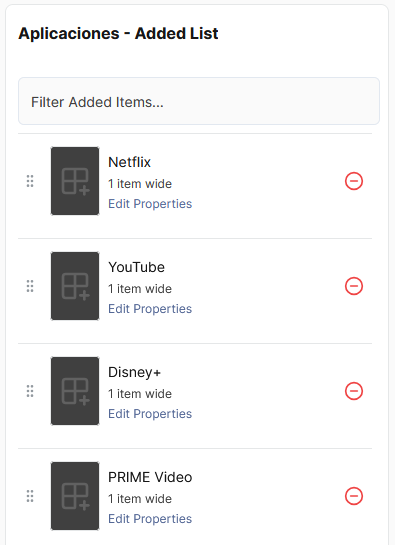
Repeat step 3 to add more applications:
-
Click Save Changes and then Continue to confirm.
-
Click < Back to Rails.
The strip should now look like this: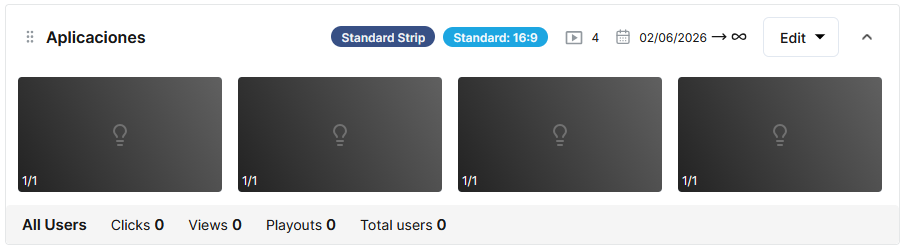
3. Add or change the package/bundle and/or store IDs for an application
Make sure that the application is configured with the correct package, bundle, and app store IDs.
To add or change the IDs for an application:
-
In the rail, click the application.
-
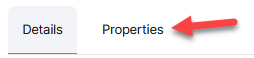
Click the Properties tab:
-
Click Edit:

-
Find the property that you need to add or change (for example,
stb_androidtv_package_idfor the AndroidTV STB package ID).
Note:-
If this application item is for a single platform, make sure the value is filled in for the relevant platform.
-
If this application is for multiple platforms, make sure the values are filled in for all the relevant platforms.
The properties are as follows:
-
stb_androidtv_package_id– the AndroidTV package ID -
mobile_ios_store_id– the iOS App Store ID -
mobile_ios_bundle_id– the iOS app bundle ID -
mobile_android_package_id– the mobile Android package ID -
integrated_linux_id– the identifier for referencing the application on integrated Linux-based environments -
stb_linux_id– the identifier for referencing the application on Linux-based STBs
-
-
Add or change the property’s value.
-
Repeat steps 4 and 5 to update additional properties.
-
If you use ION as your client application, add a property called
deeplink_uriand set its value to the appropriate URI.
Its value depends on the platform, for example:-
For Android and AndroidTV, set
deeplink_urito the URI of the app in the Play Store. ION will use this to take the user to the Play Store if the app is not installed. -
For iOS, set
deeplink_urito the Universal Link for the app. For example:-
For Netflix,
https://www.netflix.com/browse -
For Disney+,
https://www.disneyplus.com -
For YouTube,
https://youtube.com
-
-
-
Click Save.
-
Click < Back to layout.
You can use a single application item for multiple different platforms by adding the appropriate package, bundle, and/or store IDs for the platforms that the applications supports.
If you use ION as your client application, you may have to have separate app rails for different platforms so that you can set the deeplink_uri correctly for each platform. You can then target each rail to the appropriate device type by setting a Segment Target for the rail (Edit > Segment Target in the rail).
To understand how to set up segments for different device types, see 3. Target a template to a device group in Create the page hierarchy.
4. Add an image to an application
An application custom component does not include the image that the client application displays to represent the application. (For a pre-installed application, the client app uses the image from the package/bundle.)
To add an image to an application:
-
In the rail, click the application.
-
Click the Properties tab:
-
Click Edit:
-
Under Key Value Pair Groups, click Add Property:
-
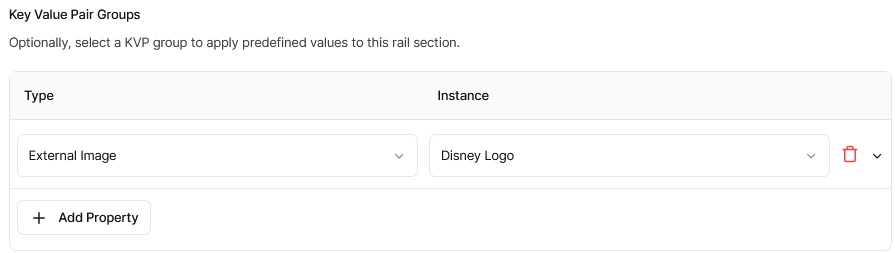
In the Type column, select either Internal Image or External Image from the drop-down:
-
Internal images are hosted by OpenTV Platform.
-
External images are hosted outside of OpenTV Platform.
-
-
In the Instance column, select the specific internal or external image to use. For example:
-
If you use ION as your client application, you must also specify an image URI:
-
Under Key Value Pair Groups, click Add Property:
-
In Key, type
image. -
In Value, type
uri. -
Click Add Property to add a second property.
-
In Key, type
image_uri. -
In Value, type or paste the URI of the image.
-
-
Click Save.
-
Click < Back to layout.
The applications that are available in the Add Content screen and the image instances that are available when editing the application item are configured in Configuration:
If you need to add additional applications or images, you can add them here. This is explained in detail in Using blueprints.
You can also modify the existing applications, for example, to add or update bundle/package IDs or app store IDs. See Custom component blueprint configuration.
Result
If you use ION, it will display the strip like this: