
Overview
The page (template) hierarchy that you set up in Rails Builder determines the pages that are available in your client application.
Setting up the page hierarchy is usually the responsibility of the operator.
You can use a single hierarchy for all the device types that you support – Rails Builder enables you to target a page (template) to a defined group of devices.
This allows you, for example, to add a page that will only be displayed on one type of device.
1. Add a top-level page
To add a top-level page:
-
From the Operator Console (OpCon) home page, click Rails Builder.
-
In Templates on the left side of the screen, click + New Template.
-
In Name, type the name of the page. For example,
Main_Menu.
Notes:-
This is displayed as the title of the page if you do not specify anything in Title.
-
By default, ION expects the top-level page to be called
Main_Menu, but NAGRAVISION can configure it to use a different value. See ION-specific FAQs.
-
-
In Title, select each locale in turn in the locale drop-down and type the title for that locale.
-
If yours is a shared system deployment (where there can be multiple tenants), select the correct tenant in Tenant ID.
-
Optionally, to hide the template, enable the Hidden toggle.
-
Under Layout Properties:
-
In Name, type the name of the layout. This is usually the same as the name of the page.
-
In Title, select each locale in turn in the locale drop-down and type the title for that locale.
-
If you are using ION as your client application, you can add various parameters to control ION’s look and feel. Referring to Top-level page properties in ION-specific configuration properties, add the required key/value pairs under Additional Properties.
-
-
Click Create Template.
The new template will be displayed in the Templates pane and the layout will be displayed in the right pane. They will both have a yellow icon to indicate that there are no active layouts.
2. Add child pages
To add child pages, in Rails Builder:
-
In Templates on the left side of the screen, find the top-level page that you just added.
-
Click

-
Follow steps 3 to 7 in the procedure above to fill in the template and layout details.
-
If you want to target the page to a specific group of devices, click + Select Segment Target under Segment Targeting.
This is explained in detail in 3. Target a template to a device group, below. -
Click Create Template.
-
Repeat the above steps for each additional child page you want to add.
-
If you are using ION as your client application:
-
For each layout (in the right pane), click
-
Under Additional Properties, add the following key/value pairs:
-
screenId– core ION screens use IDs in the range 1 to 31. For additional screens, use IDs greater than 1000. These IDs must be unique. -
routeName– for ION Desktop (web), you must provide a unique route name (string value). ION’s core screens use specific values. For additional screens, any string value is allowed as long as it is unique.
There are many other properties that you can set here to control ION’s behaviour – see Individual page properties in ION-specific configuration properties.
-
-
-
Click Save.
-
Click Save Layout.
-
Click < Back to layout.
-
Click <-Templates and Layouts.
3. Target a template to a device group
You may need certain pages to be available only on specific types of device. For example, for a managed device where you control what is installed on it, you could have an “Apps” page that lets your users access these pre-installed applications easily. But you would not want the page to be available on open devices where you cannot control what is installed.
To target an existing template to a specific device group:
3.1 Create a device profile to represent the devices
This is described in more detail in Creating and managing device profiles.
-
From the OpCon home page, click System Configuration.
-
In the left pane, click Device Management.
-
If yours is a shared deployment, select the appropriate tenant from the drop-down list. (In a non-shared deployment, there is no tenant drop-down.)
-
In the right pane, select the Device Profiles tab if it is not already selected.
-
If no profile exists for the device type you want to add, click ADD PROFILE.
-
In Profile Name, type a name for the profile (for example,
LauncherorWebOS). -
Optionally, in Device Type, type a name for the type of device (for example,
Small screen devices). -
To enable the profile, click the Status switch.
-
Leave In Home Restricted disabled.
-
Under Features, do not add any fields.
-
Click CREATE.
-
Click CONTINUE.
3.2 Create a device classifier to assign devices to the device profile
This is described in more detail in Creating and managing device classifiers.
-
From the OpCon home page, click System Configuration.
-
In the left pane, click Device Management.
-
If yours is a shared deployment, select the appropriate tenant from the drop-down list. (In a non-shared deployment, there is no tenant drop-down.)
-
In the right pane, select the Device Classifiers tab.
-
Click ADD CLASSIFIER.
-
In Name, type a name for the device classifier.
-
To enable the classifier, click the Status switch.
-
Leave Device Limit unset.
-
In Device Profile, select the profile that you created above.
-
Click ADD RULES.
-
In Operator, select the operator to be used (for example, EQUALS).
-
In Key, select the field to be used to identify the device type (for example OS_TYPE).
-
In Value, type the value (for example,
WebOS). -
Optionally, in Rules Id, type an ID for the rule.
-
If you need to add more rules to correctly classify devices, repeat steps 10 to 14.
-
Click CREATE.
-
Click CONTINUE.
3.3 Create a segment to target the device profile
To create a segment:
-
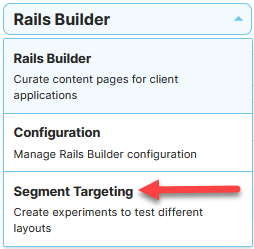
From the OpCon homepage, click Rails Builder.
-
In the drop-down at the top left, click Segment Targeting:
-
Select the Segment Targets tab.
-
Click Create Segment Target.
-
In Name, type a name for the segment.
-
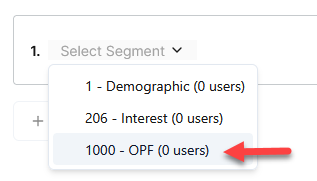
In the segment selector, click and then select OPF:
-
In the new selector that appears, select DeviceProfile:

-
In the new selector that appears, select the device profile that you created above.
-
Click Target runs permanently (no end date) to enable it.
-
In Start Date, select today’s date.
-
Click Save Targeting Experiment.
-
Click Continue.
3.4 Enable segment targeting for the template
-
From the OpCon homepage, click Rails Builder.
-
Find the template that you want to only be available on certain device types.
-
Click
-
Check the checkbox for each segment that the template should target. (You can select multiple segments.)
-
Click Apply.
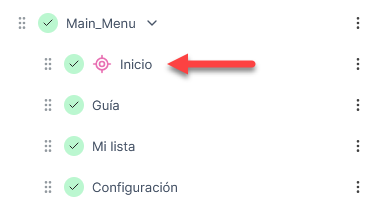
A target icon indicates that the template is now targeted to one or more segments:
4. Activate the page’s layout
When you are ready to enable the page, activate its layout:
-
From the OpCon homepage, click Rails Builder.
-
Click on the template that you want to enable.
-
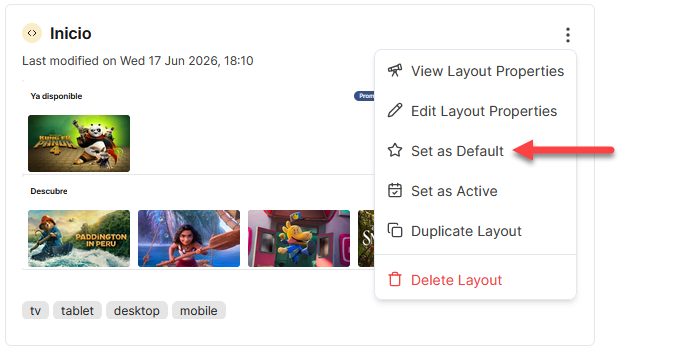
In the right pane, click
-
The icons for both the layout and the template will turn green to indicate that they are active:
